What makes the perfect treat to satisfy your sweet tooth? Rich chocolate fudge loaded with nuts and walnuts is a classic homemade favorite that’s surprisingly easy to make. With just a few simple ingredients, you can whip up a batch for a quick weeknight dessert. Save this idea for a family favorite recipe to enjoy all year round, Pin for later
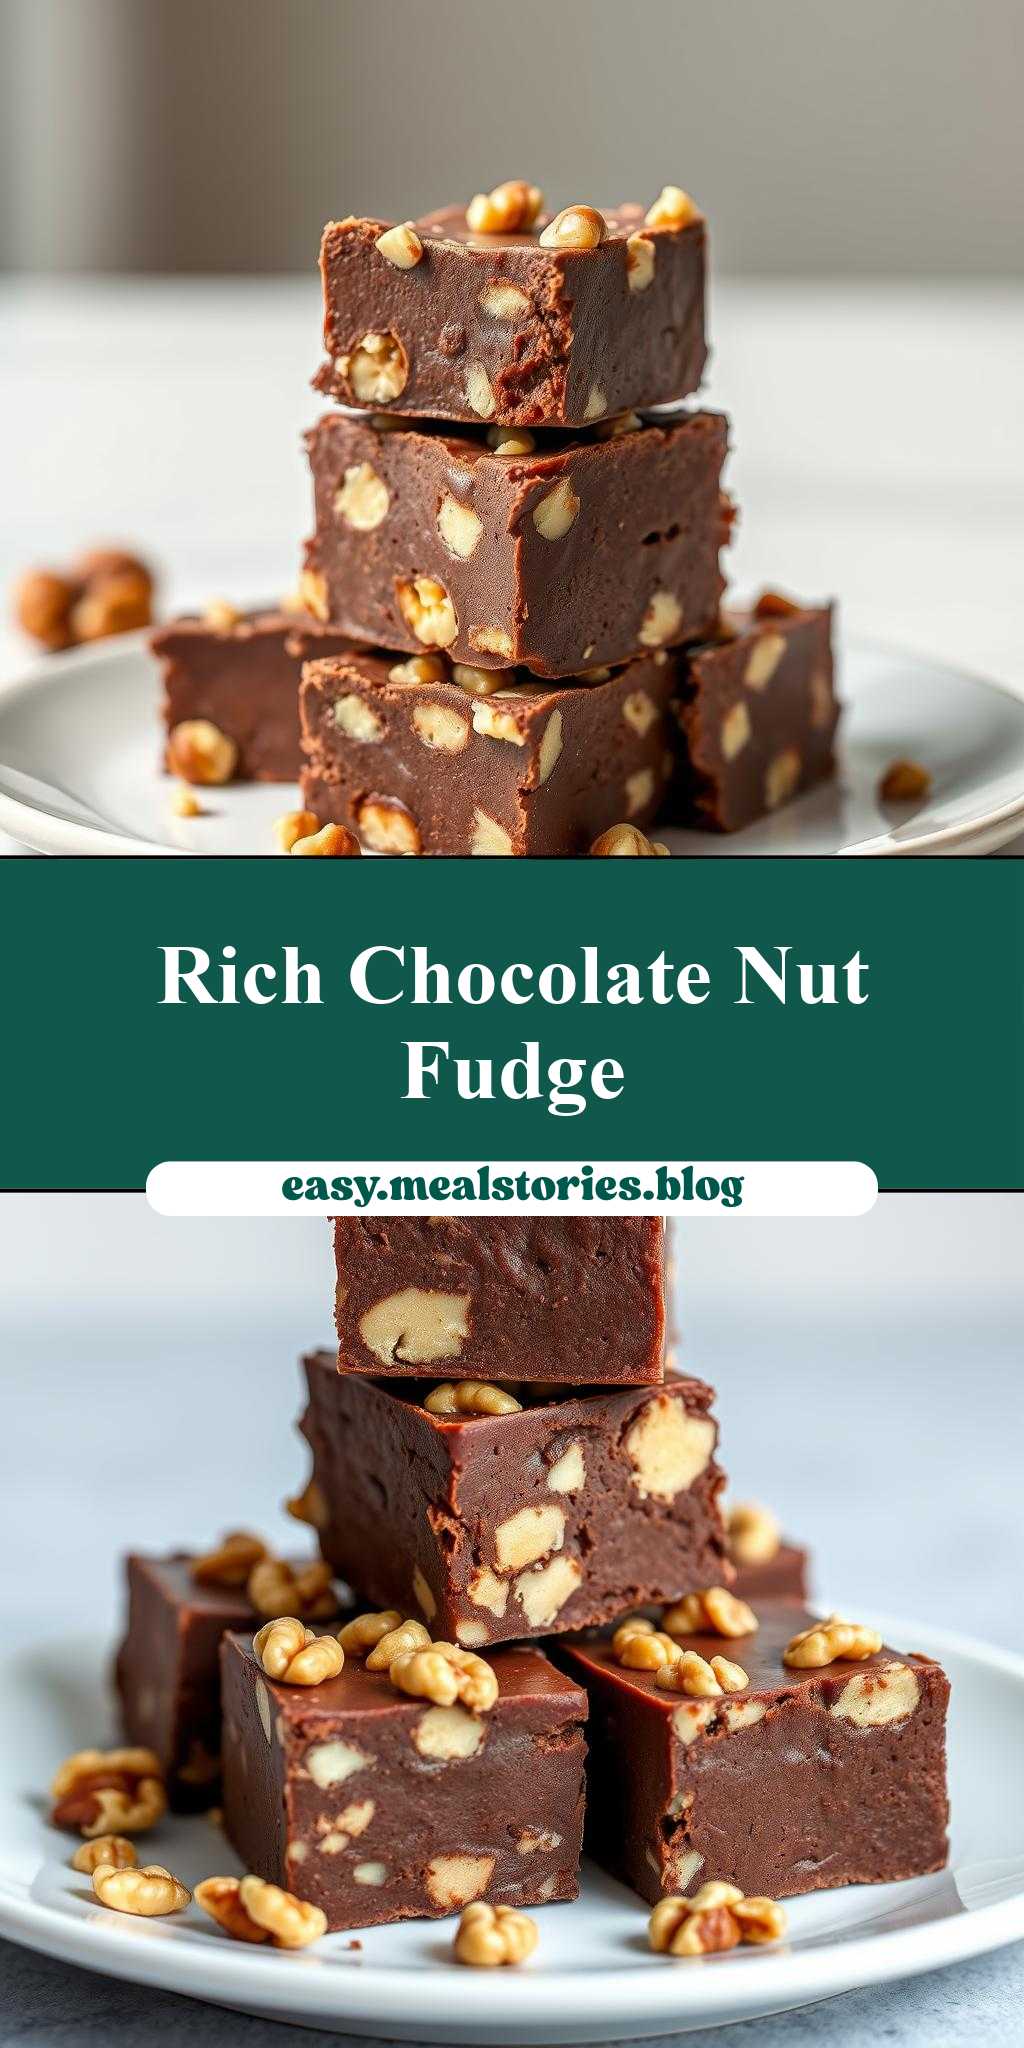
Several Pieces of Chocolate Fudge Stacked on Top of Each Other with Nuts and Walnuts
Introduction
Imagine sinking your teeth into a rich, velvety piece of chocolate fudge, infused with the deep flavors of nuts and walnuts. This decadent treat is not only a delight to the taste buds but also surprisingly easy to make, requiring just a few everyday ingredients and some basic kitchen equipment. The beauty of this chocolate fudge recipe lies in its simplicity and versatility, allowing you to experiment with different types of chocolate, nuts, and even spices to create a truly unique flavor profile. Whether you’re a seasoned baker or a novice in the kitchen, this recipe is sure to impress, making it perfect for gift-giving, special occasions, or simply as a sweet indulgence to brighten up your day.
Why This Works
- Flavor balance and ingredient accessibility: The combination of chocolate, nuts, and walnuts creates a perfect balance of flavors and textures, while the ingredients are easily accessible in most grocery stores.
- Ease of preparation: Despite its impressive appearance, this chocolate fudge is remarkably easy to prepare, requiring minimal cooking and no special baking skills.
- Impressive results with minimal effort: The layered effect of stacking the fudge pieces on top of each other, along with the addition of nuts and walnuts, creates a visually stunning dessert that looks like it came from a professional bakery, all with minimal effort.
Key Ingredients
The main ingredients for this recipe include high-quality dark or milk chocolate, heavy cream, unsalted butter, granulated sugar, and of course, nuts and walnuts. The type of chocolate you choose will significantly impact the flavor of your fudge, so feel free to experiment with different percentages of cocoa or flavor profiles like mint or orange. For the nuts, walnuts are a classic choice due to their rich, earthy flavor, but you can also use pecans, hazelnuts, or any other nut that suits your taste. Practical substitutions can be made for those with dietary restrictions, such as using vegan chocolate or coconut cream for a dairy-free version.
Instructions
- Step 1: Begin by preparing your ingredients. Chop the nuts and walnuts into small pieces and set them aside. Measure out the chocolate, cream, butter, and sugar according to the recipe.
- Step 2: In a medium saucepan, combine the heavy cream, butter, and granulated sugar. Heat the mixture over medium heat, stirring occasionally, until the sugar has dissolved and the mixture is just simmering. Remove from heat and pour over the chopped chocolate in a heatproof bowl. Let it sit for a few minutes to allow the chocolate to melt, then stir until smooth and glossy.
- Step 3: Stir in the chopped nuts and walnuts into the chocolate mixture. Pour the mixture into a lined or greased baking dish and refrigerate until set. This can take anywhere from 2 to 4 hours, depending on the size of your dish and the temperature of your refrigerator.
- Step 4: Once the fudge is set, remove it from the refrigerator and use a sharp knife to cut it into squares or any other shape you prefer. To create the stacked effect, simply place one piece of fudge on top of another, securing them with a dab of melted chocolate if necessary. You can decorate the top with additional nuts or a drizzle of chocolate for a more polished look.
Handy Tips
- For a creamier fudge, don’t overheat the chocolate mixture, as this can cause the chocolate to seize up and become grainy. Also, avoid overmixing once the nuts are added, to preserve their texture.
- Experiment with different spices or flavor extracts like vanilla, cinnamon, or orange zest to give your fudge a unique twist.
- Always use high-quality chocolate for the best flavor. If you’re using a mixture of dark and milk chocolate, melt them separately before combining to ensure a smooth blend.
Heat Control
Heat control is crucial when making chocolate fudge, especially when melting the chocolate and heating the cream mixture. Ideally, you want to melt the chocolate gently, either in a double boiler or by heating it in short bursts in the microwave, stirring between each heating. For the cream mixture, medium heat is sufficient, and it’s essential to remove it from the heat as soon as it starts to simmer to prevent boiling over or scorching the mixture.
Crunch Factor
The crunch factor in this recipe comes from the nuts and walnuts. To achieve the perfect crunch, it’s crucial not to overmix the fudge once the nuts are added, as this can cause them to break down and lose their texture. Also, toasting the nuts lightly in a dry pan before chopping them can enhance their flavor and texture, adding an extra layer of crunch to your fudge.
Pro Kitchen Tricks
- For a professional finish, temper your chocolate before making the fudge. Tempering gives the chocolate a smooth, glossy appearance and a satisfying snap when broken.
- Use a water bath when melting chocolate to prevent it from seizing up due to high temperatures.
- Keep your fudge fresh by storing it in an airtight container in the refrigerator. Let it come to room temperature before serving for the best flavor and texture.
Storage Tips
- Store the fudge in an airtight container in the refrigerator to keep it fresh for up to 2 weeks.
- For longer storage, the fudge can be frozen. Wrap it tightly in plastic wrap or aluminum foil and place it in a freezer-safe bag. Frozen fudge will keep for up to 3 months. Let it thaw in the refrigerator overnight before serving.
- When reheating or serving, let the fudge come to room temperature for the best flavor and texture.
Gift Packaging Ideas
This chocolate fudge makes a wonderful gift, especially when packaged nicely. Consider placing the stacked fudge pieces in decorative jars or tin boxes, wrapped in colorful paper or ribbons. You can also add a personal touch with a handwritten note or a small bag of gourmet coffee or tea to complement the chocolate. For a more rustic look, wrap the fudge pieces individually in parchment paper or cellophane bags and tie them with twine.
Flavor Variations
- Different spices: Add a pinch of salt, a teaspoon of vanilla extract, or a sprinkle of cinnamon to give your fudge a unique flavor dimension.
- Creative toppings: Experiment with different nuts, dried fruits, or even candy pieces to add texture and flavor contrast to your fudge.
- Ingredient swaps: Use different types of chocolate, such as white chocolate or flavored chocolate chips, or substitute the heavy cream with a non-dairy milk for a vegan version.
Troubleshooting
- Texture problems: If your fudge turns out too soft, it may be due to overheating the chocolate or not chilling it long enough. If it’s too hard, it could be from overcooking the sugar mixture or using too much chocolate.
- Ingredient replacements: Always consider the flavor and texture when substituting ingredients. For example, using milk chocolate instead of dark chocolate will result in a sweeter, milder fudge.
- Over/undercooking signs: Keep an eye on the temperature and texture of your mixture. Overheating can cause the chocolate to seize or the sugar to caramelize too quickly, while underheating may result in a fudge that doesn’t set properly.
FAQs
- Can I freeze it? Yes, the fudge can be frozen for up to 3 months. Wrap it tightly and store it in a freezer-safe bag.
- Is it gluten-free? Yes, this recipe is naturally gluten-free, making it suitable for those with gluten intolerance or sensitivity.
- Can I double the recipe? Yes, you can easily double or triple the recipe if you’re making it for a larger crowd. Just ensure you have a large enough dish to accommodate the increased volume.
Conclusion
Making several pieces of chocolate fudge stacked on top of each other with nuts and walnuts is a fun and rewarding process that combines the richness of chocolate with the crunch of nuts, all in a beautifully presented dessert. With its ease of preparation, versatility in flavor and texture, and the impressive presentation, this recipe is perfect for any chocolate lover. Don’t be afraid to experiment and make it your own, and remember, the key to a perfect fudge is in the balance of flavors and the control of temperatures. Happy baking, and enjoy the delightful experience of creating and savoring this delicious treat!
Several Pieces of Chocolate Fudge Stacked on Top of Each Other with Nuts and Walnuts
A rich, velvety chocolate fudge infused with the deep flavors of nuts and walnuts, perfect for gift-giving or as a sweet indulgence.
🥘 Ingredients
👩🍳 Instructions
-
1Prepare ingredients by chopping nuts and measuring out chocolate, cream, butter, and sugar.
-
2Heat cream, butter, and sugar over medium heat until sugar dissolves, then pour over chocolate and let it melt.
-
3Stir in chopped nuts and walnuts, then pour mixture into a lined dish and refrigerate until set.
-
4Cut fudge into squares and stack them on top of each other, securing with melted chocolate if necessary.