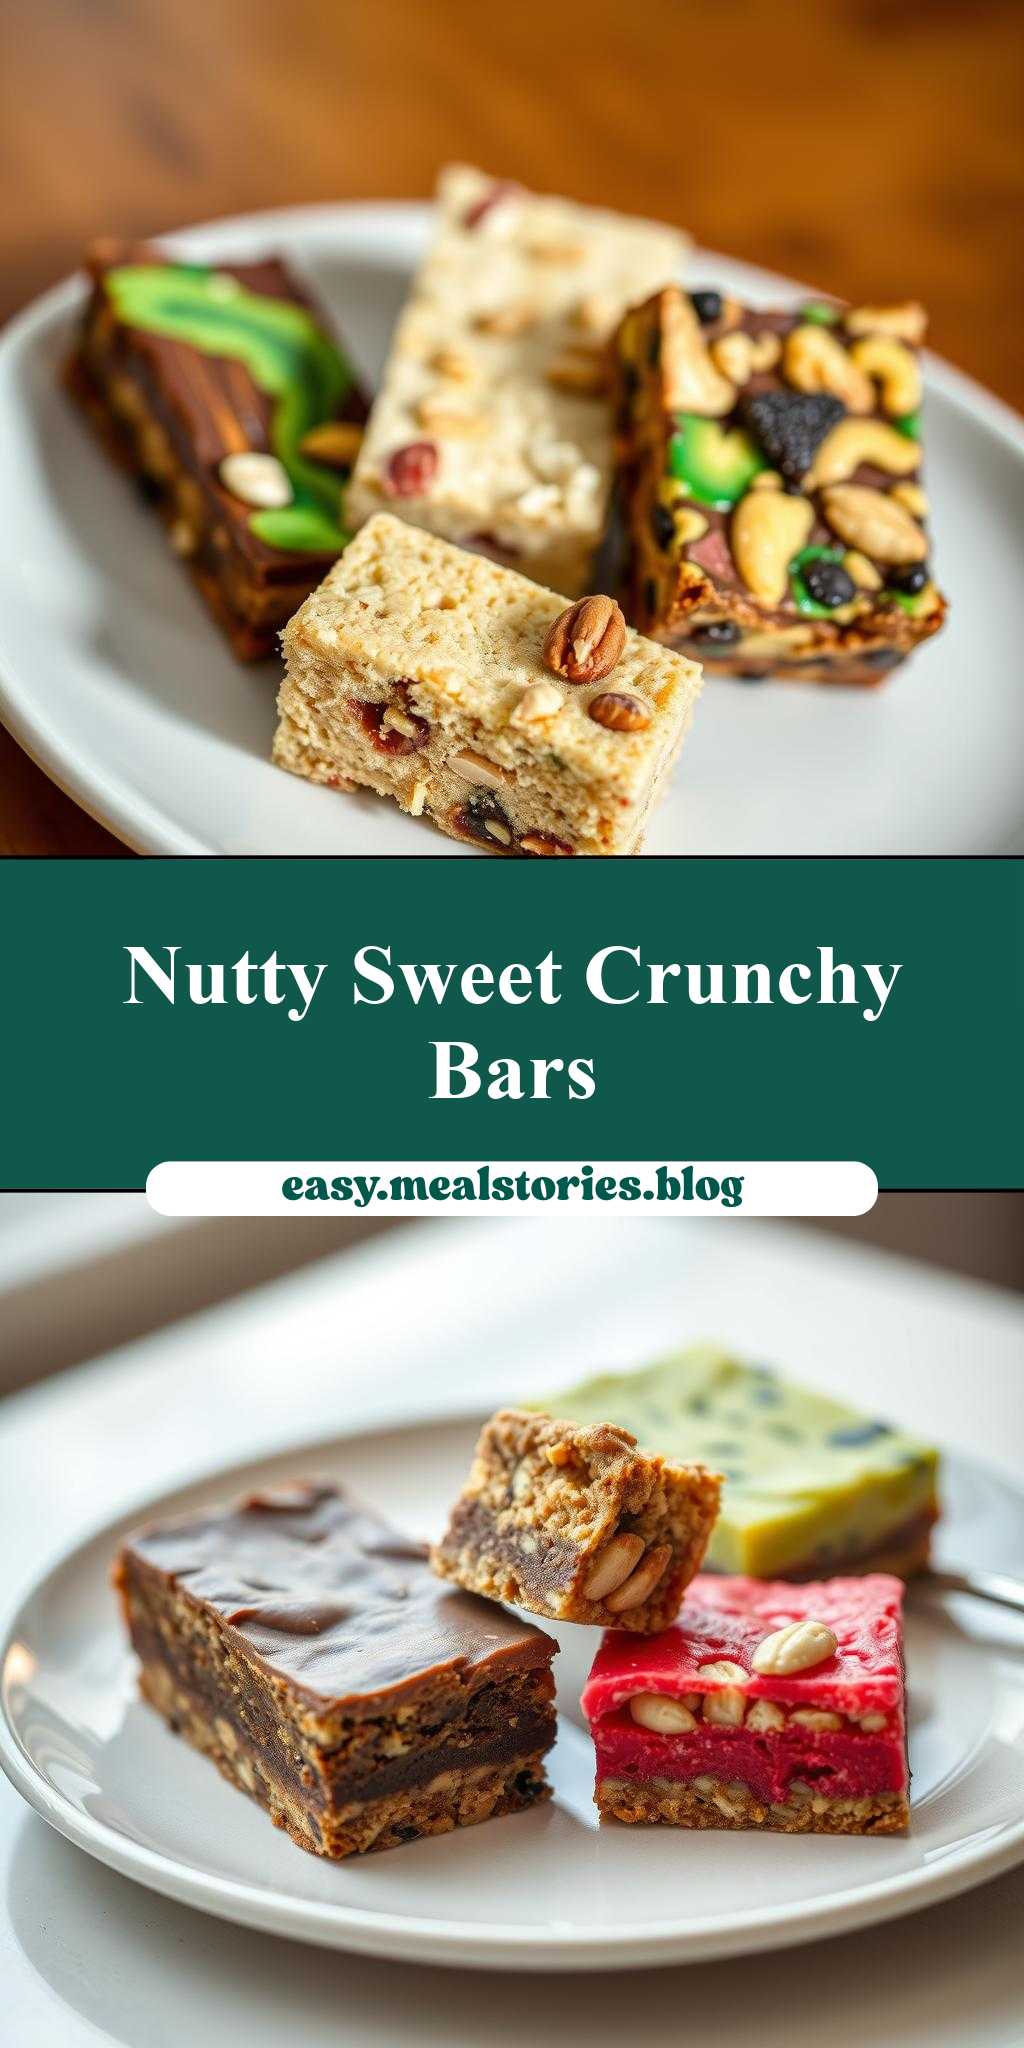
What’s the perfect treat to satisfy your sweet and salty cravings? This plate of homemade bars offers a delicious variety, including one with crunchy nuts for added texture. Made with easy-to-find ingredients like oats and honey, these quick bars are a family favorite. Save this idea for a weeknight dinner dessert solution.
there are three different types of bars on the plate and one has nuts in it
Introduction
Imagine a plate filled with a variety of delicious bars, each offering a unique flavor and texture experience. Among these treats, one stands out with the addition of nuts, adding a satisfying crunch to the mix. This assortment of bars is not only a feast for the eyes but also a testament to the ease and creativity of using everyday ingredients to produce something truly special. With minimal effort, you can create a selection of bars that are perfect for snacking, gift-giving, or as a centerpiece for any gathering. The combination of flavors, from the sweetness of the bars to the earthy taste of the nuts, ensures that there’s something for everyone to enjoy.
Why This Works
- Flavor balance and ingredient accessibility: The recipe strikes a perfect balance between sweet and savory, using ingredients that are readily available in most kitchens.
- Ease of preparation: The steps to create these bars are straightforward and require minimal cooking, making it an ideal project for beginners or those short on time.
- Impressive results with minimal effort: Despite the simplicity of the recipe, the end result is visually appealing and sure to impress, whether you’re serving to family, friends, or bringing to a potluck.
Key Ingredients
The main ingredients for these bars include a base mixture of oats, honey, and peanut butter for the no-bake bars, a mix of flour, sugar, and eggs for the baked bars, and a combination of melted chocolate, nuts, and dried fruits for the chocolate-nut bars. Practical substitutions can be made based on dietary needs or preferences, such as using almond butter instead of peanut butter or opting for gluten-free flour. The nuts, which can be any variety such as walnuts, almonds, or pecans, add a crucial textural element and flavor depth to one of the bar types.
Instructions
- Step 1: Begin by preparing your ingredients. For the no-bake bars, mix together the oats, honey, and peanut butter in a large bowl until well combined. For the baked bars, preheat your oven to 350°F (175°C) and mix the flour, sugar, and eggs in another bowl. For the chocolate-nut bars, melt the chocolate in a double boiler or in the microwave in 30-second increments, stirring between each interval until smooth.
- Step 2: Press the no-bake mixture into a lined or greased pan. For the baked bars, pour the mixture into a separate lined or greased pan and bake for about 20-25 minutes, or until a toothpick inserted comes out clean. For the chocolate-nut bars, stir in the nuts and dried fruits once the chocolate is melted.
- Step 3: Layer the flavors or textures as needed. For the no-bake bars, you might add a layer of melted chocolate on top. For the baked bars, consider adding nuts or dried fruits into the batter before baking. For the chocolate-nut bars, simply pour the mixture into a lined or greased pan.
- Step 4: Final touches involve letting each bar type set. For the no-bake and chocolate-nut bars, this means refrigerating them until firm, typically a couple of hours. For the baked bars, let them cool completely in the pan before cutting into bars. Once cooled or set, cut into desired bar sizes and serve.
Handy Tips
- For the no-bake bars, make sure to press the mixture firmly into the pan to ensure they hold their shape well. For the baked bars, don’t overmix the batter to prevent toughness. And for the chocolate-nut bars, stirring in the nuts and dried fruits gently will help distribute them evenly without creating clumps.
Heat Control
When baking the bars, it’s crucial to keep an eye on them to avoid overcooking. The ideal temperature is 350°F (175°C), and the baking time will depend on the size of your pan and the thickness of the batter. Look for the edges to be lightly golden and the center to be set. For the no-bake and chocolate-nut bars, since they don’t require baking, the focus is on ensuring the chocolate is melted smoothly and the mixtures are well combined.
Crunch Factor
The crunch factor in these bars, particularly the one with nuts, is achieved by adding nuts to the mixture before setting. For an extra crunch, you can also sprinkle some chopped nuts on top of the bars before they set. The texture contrast between the chewy or soft base and the crunchy nuts enhances the overall snacking experience.
Pro Kitchen Tricks
- Using a silicone spatula to mix and press the no-bake mixture can help prevent sticking. For the baked bars, lining the pan with parchment paper makes removal and cutting much easier. And for the chocolate-nut bars, melting the chocolate in short intervals and stirring between each helps prevent burning.
Storage Tips
- These bars can be stored in an airtight container in the refrigerator for up to a week. For longer storage, consider freezing them. When freezing, it’s best to cut the bars first and then place them in a freezer-safe bag or container, separated by parchment paper to prevent sticking.
Gift Packaging Ideas
These bars are perfect for gifting, especially when packaged nicely. Consider placing them in decorative jars, wrapping them individually in plastic wrap or aluminum foil and then in a decorative paper or bag, or arranging them in a gift box. Adding a ribbon or a gift tag with a personal message makes the gift even more special.
Flavor Variations
- Different spices: Adding a pinch of cinnamon, nutmeg, or ginger to the no-bake or baked bars can give them a unique twist.
- Creative toppings: Before the no-bake or chocolate-nut bars set, you can sprinkle them with coconut flakes, candy pieces, or even cereal for added texture and flavor.
- Ingredient swaps: Swapping peanut butter with another nut butter like almond or cashew butter can change the flavor profile of the no-bake bars. Similarly, using different types of chocolate for the chocolate-nut bars can offer variations in sweetness and flavor.
Troubleshooting
- Texture problems: If the no-bake bars are too soft, they might need more time in the refrigerator to set. If the baked bars are too hard, they might have been overbaked.
- Ingredient replacements: Always consider the flavor and texture the replaced ingredient brings to the recipe. For example, replacing nuts with seeds will change the texture and potentially the flavor.
- Over/undercooking signs: For baked bars, look for the edges to be golden brown and the center to be set. For no-bake and chocolate-nut bars, make sure they are firm to the touch and not sticky.
FAQs
- Can I freeze it? Yes, these bars can be frozen for up to 3 months. It’s best to freeze them after cutting into bars and place them in a freezer-safe bag or container.
- Is it gluten-free? Depending on the ingredients used, especially the type of flour for the baked bars, these can be made gluten-free. Ensure all ingredients, including the oats and chocolate, are gluten-free.
- Can I double the recipe? Yes, you can easily double or even triple the recipe if you’re planning for a larger crowd. Just remember to adjust the baking time if you’re making a larger batch of baked bars.
Conclusion
Creating a plate of assorted bars, including one with nuts, is a fun and rewarding project that combines ease, flavor, and creativity. Whether you’re a seasoned baker or just starting out, this recipe offers a versatile base that can be adapted to suit various tastes and dietary needs. The key to success lies in the balance of flavors, the texture contrasts, and the presentation. Don’t be afraid to experiment with different ingredients and toppings to make the recipe your own. With these bars, you’ll have a delicious treat to enjoy yourself or to share with others, and the process of making them is just as enjoyable as the end result.
there are three different types of bars on the plate and one has nuts in it
A variety of delicious bars, including one with nuts, perfect for snacking or gift-giving, made with everyday ingredients and minimal effort.
🥘 Ingredients
👩🍳 Instructions
-
1Prepare ingredients for each bar type.
-
2Mix and press no-bake mixture into a pan, bake the baked bars, and melt chocolate for the chocolate-nut bars.
-
3Layer flavors or textures as desired.
-
4Let each bar type set or cool before cutting and serving.