What makes a cheesecake truly unforgettable? Rich blueberry flavor and a velvety Oreo crust come together in this homemade dessert, perfect for a family favorite treat. With easy homemade ingredients like fresh blueberries, try making this show-stopping cheesecake for a weeknight dinner gathering. Save this idea for your next special occasion dessert.
two pictures of blueberry velvet oreo cheesecake
Introduction
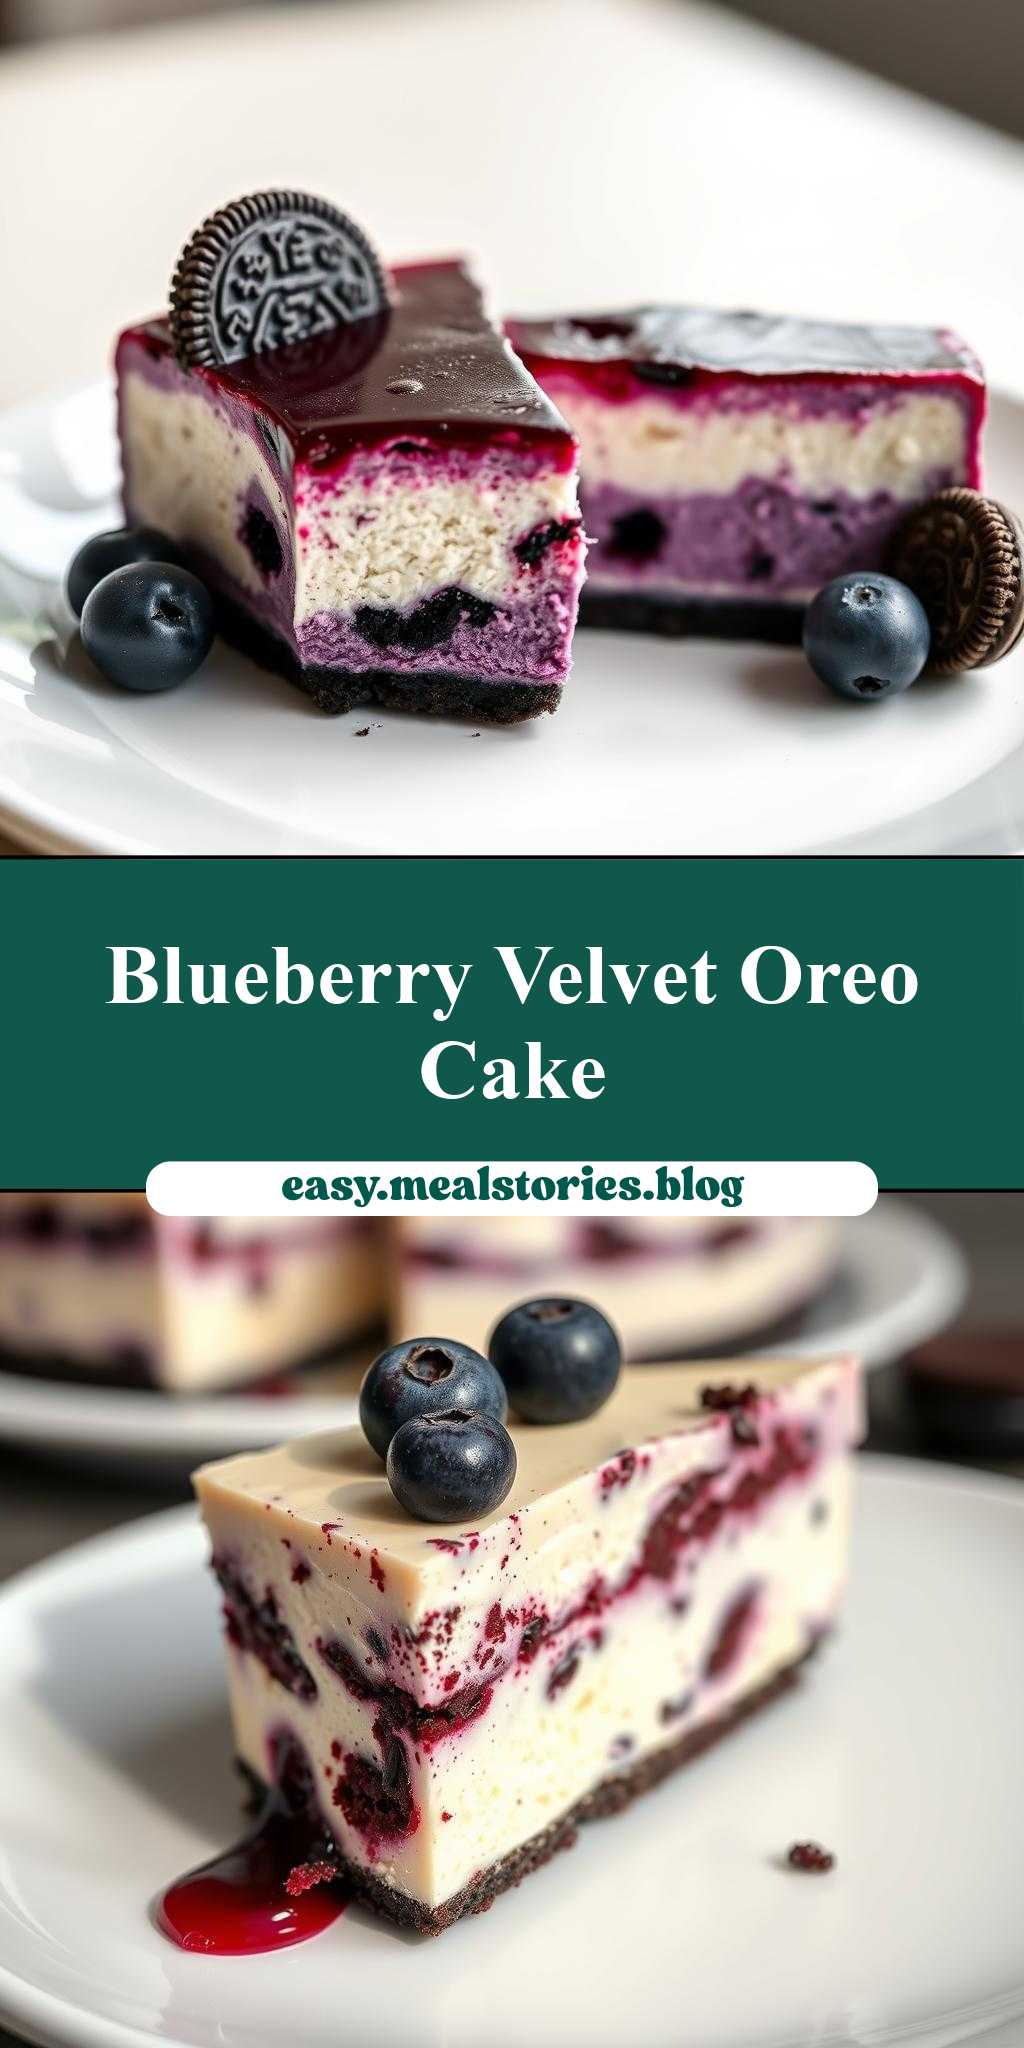
Imagine a dessert that combines the richness of cheesecake, the crunch of Oreo cookies, and the sweetness of blueberries, all wrapped up in a velvet-smooth texture. The two pictures of blueberry velvet oreo cheesecake are not just a treat for the taste buds but a feast for the eyes as well. This recipe is all about ease, flavor, and creativity, using everyday ingredients to create a masterpiece that will impress your family and friends. With its unique blend of textures and flavors, this cheesecake is perfect for special occasions or just a sweet treat any day of the week.
Why This Works
- Flavor balance and ingredient accessibility: The combination of blueberries, Oreo cookies, and cheesecake filling creates a perfect balance of sweet and tangy flavors, and all the ingredients are easily found in most supermarkets.
- Ease of preparation: Despite its impressive appearance, this cheesecake is relatively easy to prepare, with a simple crust made from Oreo cookies and a filling that requires no cooking.
- Impressive results with minimal effort: The velvet texture of the cheesecake, combined with the vibrant color of the blueberries, makes for a stunning presentation that belies the simplicity of the recipe.
Key Ingredients
The main ingredients in this recipe include Oreo cookies for the crust, a mixture of cream cheese, sugar, eggs, and sour cream for the cheesecake filling, and fresh or frozen blueberries for the topping. For the velvet texture, we add a bit of food coloring to give it that distinctive look. Practical substitutions can be made, such as using different types of cookies for the crust or raspberries instead of blueberries for a different flavor profile.
Instructions
- Step 1: Begin by preparing the crust. Crush the Oreo cookies in a food processor until they are finely ground, then mix with a bit of melted butter to hold the crust together. Press the mixture into the bottom of a springform pan.
- Step 2: Prepare the cheesecake filling. Beat the cream cheese and sugar together until smooth, then add the eggs one at a time, followed by the sour cream. Add a few drops of blue food coloring to give the cheesecake its velvet color.
- Step 3: Pour the cheesecake filling over the crust and smooth the top. Bake the cheesecake in a preheated oven until the edges are set and the center is just slightly jiggly.
- Step 4: Allow the cheesecake to cool completely, then top with fresh or frozen blueberries. You can arrange the blueberries in a pattern to match the “two pictures” theme or simply scatter them across the top of the cheesecake.
Handy Tips
- To ensure the cheesecake sets properly, avoid overmixing the batter and make sure the oven is at the correct temperature.
- For a water bath, wrap the outside of the springform pan with foil and place it in a larger pan filled with water to prevent cracking.
- Let the cheesecake cool completely in the pan before attempting to remove it, as this will help prevent cracking.
Heat Control
If you’re using a conventional oven, the ideal temperature for baking the cheesecake is 325°F (165°C), and the baking time will be around 50-60 minutes, depending on the size of your cheesecake. You’ll know the cheesecake is done when the edges are set and the center is just slightly jiggly. Avoid overbaking, as this can cause the cheesecake to dry out.
Crunch Factor
The crunch in this dessert comes from the Oreo cookie crust, which provides a nice contrast to the smooth cheesecake filling. To achieve the right crunch, make sure the crust is evenly pressed into the pan and baked until it’s lightly browned. You can also add some chopped nuts or cookie pieces to the cheesecake batter for extra texture.
Pro Kitchen Tricks
- Use room temperature ingredients for a smoother cheesecake batter.
- Avoid overbaking by checking the cheesecake frequently towards the end of the baking time.
- For a clean slice, dip your knife in hot water and wipe it dry before cutting the cheesecake.
Storage Tips
- Store the cheesecake in the refrigerator for up to 5 days.
- Freeze the cheesecake for up to 2 months, wrapped tightly in plastic wrap or aluminum foil.
- When reheating, let the cheesecake come to room temperature or warm it gently in the oven to prevent cracking.
Gift Packaging Ideas
This cheesecake makes a beautiful gift, especially when presented in a decorative tin or on a cake stand. Consider adding a ribbon around the tin or a sprinkle of powdered sugar on top of the cheesecake for a finishing touch. You could also include a packet of gourmet coffee or a box of chocolates to make it a complete gift basket.
Flavor Variations
- Try using different types of cookies for the crust, such as chocolate sandwich cookies or peanut butter cookies, for a unique flavor twist.
- Add some creative toppings, such as caramel sauce, chopped nuts, or fresh fruit, to give the cheesecake extra flavor and texture.
- Swap out the blueberries for raspberries, strawberries, or any other type of berry for a different flavor profile.
Troubleshooting
- Texture problems: If the cheesecake is too dense, it may be due to overmixing the batter. If it’s too soft, it may not have been baked long enough.
- Ingredient replacements: If you don’t have sour cream, you can substitute it with Greek yogurt or regular yogurt. If you don’t have blue food coloring, you can omit it or use a different color.
- Over/undercooking signs: Check the cheesecake frequently towards the end of the baking time to avoid overcooking. If the edges are set and the center is just slightly jiggly, it’s done. If it’s still very jiggly, it needs more baking time.
FAQs
- Can I freeze it? Yes, you can freeze the cheesecake for up to 2 months. Wrap it tightly in plastic wrap or aluminum foil and thaw it overnight in the refrigerator when you’re ready to serve.
- Is it gluten-free? The Oreo cookie crust contains gluten, but you can substitute it with a gluten-free cookie or make a crust from ground nuts for a gluten-free option.
- Can I double the recipe? Yes, you can double the recipe to make a larger cheesecake. Just keep in mind that the baking time will be longer, so check the cheesecake frequently to avoid overcooking.
Conclusion
This two pictures of blueberry velvet oreo cheesecake is a show-stopping dessert that’s sure to impress your family and friends. With its unique blend of textures and flavors, it’s perfect for special occasions or just a sweet treat any day of the week. Don’t be afraid to get creative with the recipe and make it your own – and don’t forget to share your beautiful cheesecake on social media using the hashtag #blueberryvelvetcake!
two pictures of blueberry velvet oreo cheesecake
A rich and creamy cheesecake with a velvet-smooth texture, topped with fresh blueberries and sitting on a crunchy Oreo cookie crust.
🥘 Ingredients
👩🍳 Instructions
-
1Preheat the oven to 325°F (165°C).
-
2Prepare the crust by mixing the crushed Oreo cookies with the sugar and melted butter. Press the mixture into the bottom of a springform pan.
-
3Prepare the cheesecake filling by beating the cream cheese and sugar together until smooth. Add the eggs one at a time, followed by the vanilla extract and sour cream.
-
4Pour the cheesecake filling over the crust and smooth the top. Bake the cheesecake for 50-60 minutes, or until the edges are set and the center is just slightly jiggly.
-
5Allow the cheesecake to cool completely in the pan, then top with fresh or frozen blueberries.