What makes a perfect layer cake so irresistible? This stunning dessert features rich chocolate and creamy green frosting, made with simple homemade techniques and just a few key ingredients like high-quality cocoa powder. Save this idea for your next special occasion dessert.
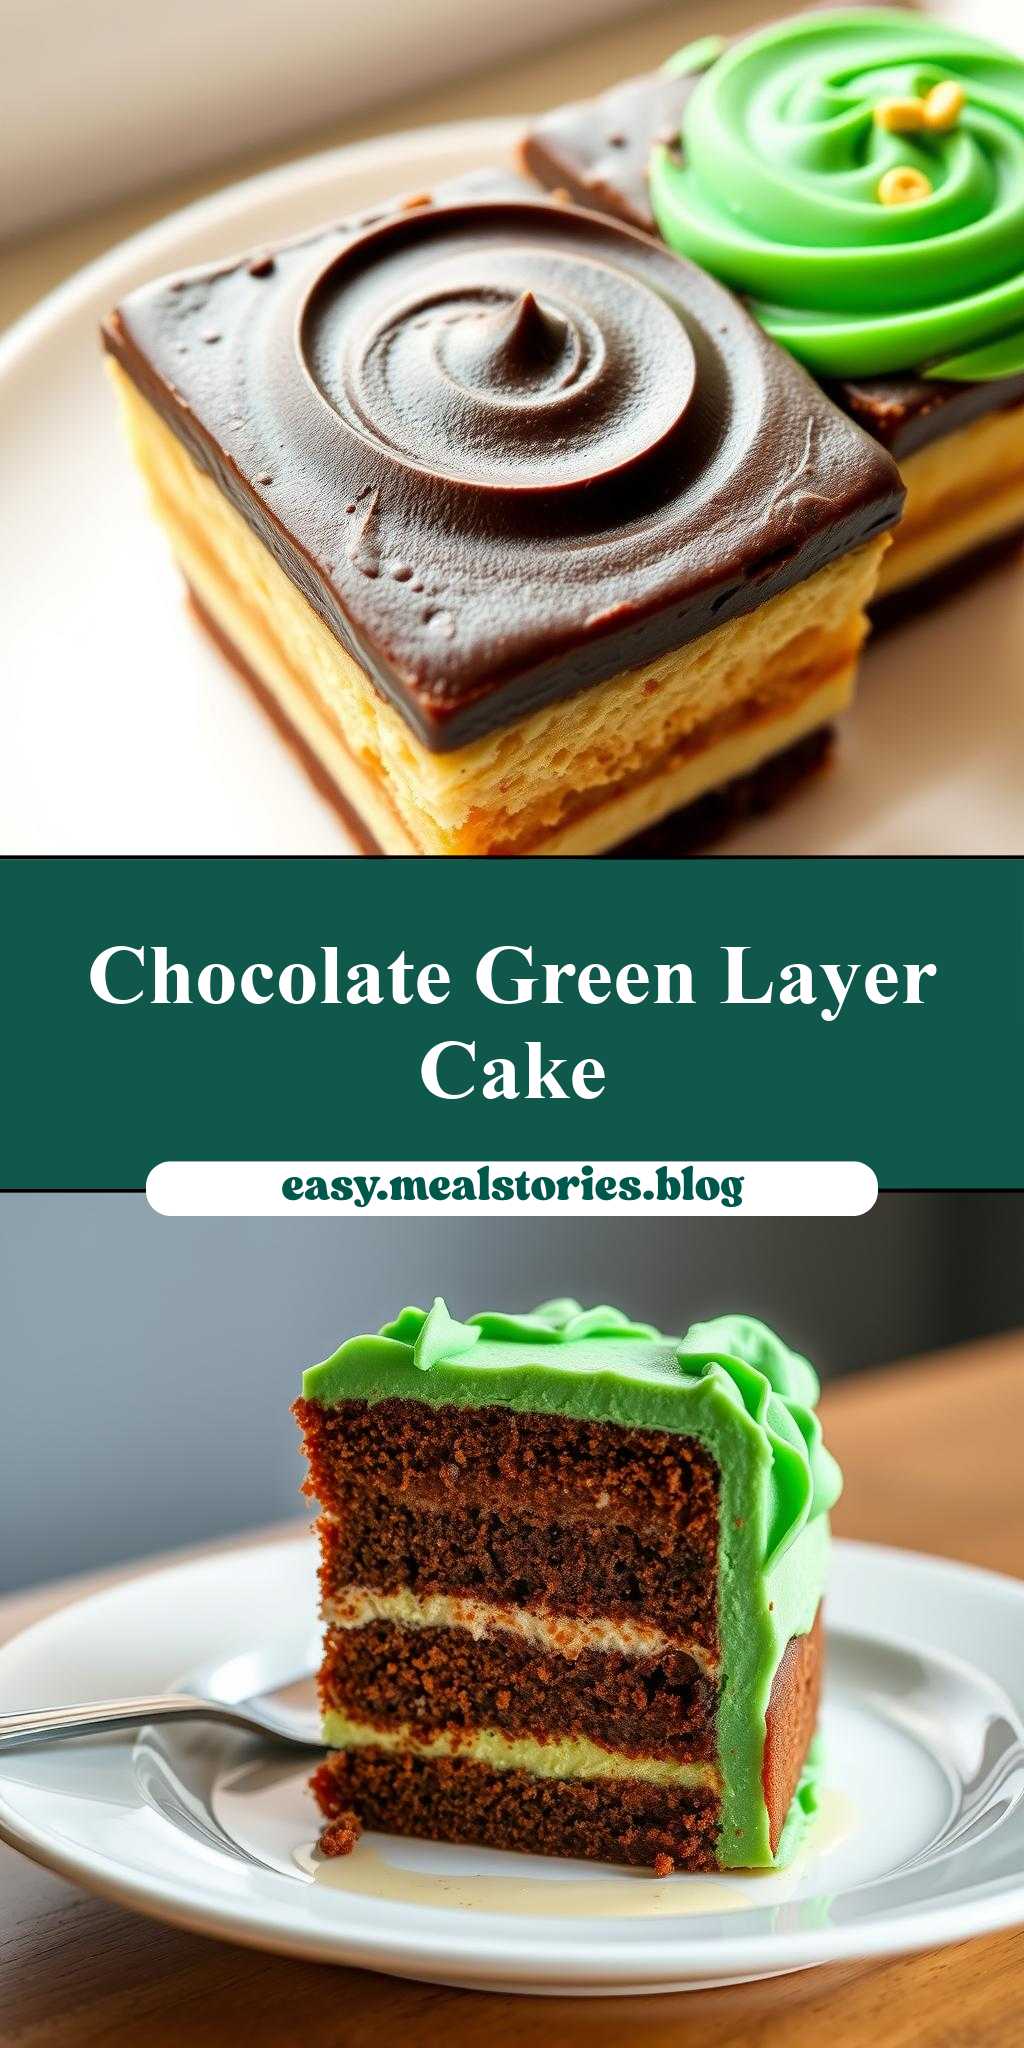
two pictures of a cake with chocolate and green frosting on it, one has the same layer as the other
Introduction
Imagine a cake so divine, it’s almost too beautiful to eat. The “two pictures of a cake with chocolate and green frosting on it, one has the same layer as the other” is a masterpiece of culinary art that combines the richness of chocolate with the vibrancy of green frosting, creating a visual and gastronomic experience that will leave you and your guests in awe. This recipe is not just about creating a stunning cake; it’s about the joy of baking, the ease of using everyday ingredients to craft something extraordinary, and the creativity that comes with making something truly unique. Whether you’re a seasoned baker or just starting your culinary journey, this cake is sure to impress with its simplicity, flavor, and the impressive presentation that makes it perfect for any occasion.
Why This Works
- Flavor balance and ingredient accessibility: The combination of chocolate and green frosting offers a delightful contrast of flavors that are both accessible and easy to work with, making this cake a favorite among both beginners and experienced bakers.
- Ease of preparation: Despite its impressive appearance, this cake requires minimal effort and time, making it an ideal choice for those looking to create a stunning dessert without spending hours in the kitchen.
- Impressive results with minimal effort: The simplicity of the recipe belies the impressive results, as the layering of chocolate cake with green frosting creates a visually stunning effect that suggests a much more complex preparation process.
Key Ingredients
To create this masterpiece, you’ll need a few key ingredients. For the cake, you’ll require all-purpose flour, granulated sugar, unsweetened cocoa powder, baking powder, salt, large eggs, milk, and vegetable oil. For the frosting, you’ll need unsalted butter, powdered sugar, green food coloring, and a bit of milk or heavy cream to achieve the perfect consistency. Practical substitutions can be made, such as using almond milk instead of regular milk for a dairy-free option or adding a teaspoon of instant coffee to intensify the chocolate flavor. The green frosting can also be adjusted in color intensity to match your desired theme or occasion.
Instructions
- Step 1: Begin by preheating your oven to 350°F (180°C). Prepare two 9-inch round cake pans by greasing them and lining the bottoms with parchment paper. In a medium bowl, whisk together flour, sugar, cocoa powder, baking powder, and salt. In a large bowl, whisk together eggs, milk, and oil. Gradually add the dry ingredients to the wet ingredients, whisking until smooth.
- Step 2: Divide the batter evenly between the prepared pans and smooth the tops. Bake for about 30-35 minutes or until a toothpick inserted in the center comes out clean. Let the cakes cool in the pans for 10 minutes before transferring them to a wire rack to cool completely.
- Step 3: For the frosting, beat the butter in a large bowl until creamy. Gradually add the powdered sugar, beating until smooth and creamy. Add a few drops of green food coloring until you achieve the desired color. Adjust the consistency with milk or heavy cream if necessary. Once the cakes are completely cool, place one layer on a serving plate and spread a generous amount of frosting on top. Place the second layer on top and frost the entire cake with the remaining frosting.
- Step 4: For the final touches, you can decorate the cake as desired. This could involve adding more frosting details, sprinkles, or even edible images to match the “two pictures” theme. The key is to have fun and be creative with your design.
Handy Tips
- To ensure your cake layers are even, make sure to divide the batter evenly between the two pans. You can also use a scale to measure the batter for precision.
- For a more intense chocolate flavor, use dark cocoa powder or add a teaspoon of instant coffee to the batter.
- To prevent the cake from becoming too dense, don’t overmix the batter, and make sure to not overbake.
Heat Control
Heat control is crucial when baking the cake. The ideal temperature is 350°F (180°C), and the cakes should be baked for about 30-35 minutes. Signs of doneness include the cake pulling away from the sides of the pan, a toothpick inserted in the center coming out clean, and the top being set and slightly springy to the touch. It’s also important to not open the oven door too frequently during the baking time, as this can cause the cakes to sink.
Crunch Factor
The “crunch factor” in this recipe can be achieved by adding nuts or chocolate chips to the batter before baking. This adds a delightful texture contrast to the softness of the cake and the creaminess of the frosting. Alternatively, you can sprinkle chopped nuts or shaved chocolate on top of the frosting for a similar effect.
Pro Kitchen Tricks
- To ensure the frosting sets properly and doesn’t become too runny, make sure the cakes are completely cool before frosting. You can also refrigerate the frosted cake for about 10 minutes to set the frosting before serving.
- For a smoother frosting, make sure to sift the powdered sugar before adding it to the butter. This removes any lumps and ensures a creamy texture.
- Use room temperature ingredients for the frosting to ensure it mixes smoothly and evenly.
Storage Tips
- The cake can be stored at room temperature for up to 3 days. It’s best to keep it in an airtight container to prevent drying out.
- For longer storage, the cake can be refrigerated for up to 5 days. Bring it to room temperature before serving for the best flavor and texture.
- Freezing is also an option; the cake can be frozen for up to 2 months. Wrap it tightly in plastic wrap or aluminum foil and thaw at room temperature when ready to serve.
Gift Packaging Ideas
This cake makes a wonderful gift, especially for birthdays, anniversaries, or other special occasions. Consider packaging it in a decorative cake box or wrapping it in colorful plastic wrap and tying it with a ribbon. You can also add a personal touch with a handwritten note or a small gift on top of the cake. For a more rustic look, place the cake on a wooden board or a decorative plate and wrap it in a burlap sack tied with twine.
Flavor Variations
- Different spices: Add a pinch of salt or a teaspoon of cinnamon to the batter for a unique flavor twist.
- Creative toppings: Instead of traditional frosting, top the cake with whipped cream, chocolate shavings, or chopped nuts for a different texture and flavor.
- Ingredient swaps: Use almond flour instead of all-purpose flour for a gluten-free option, or substitute the milk with a non-dairy alternative for a vegan version.
Troubleshooting
- Texture problems: If the cake turns out too dense, it might be due to overmixing the batter. Try to mix the ingredients just until they come together for a lighter texture.
- Ingredient replacements: If you’re missing an ingredient, consider what you can substitute it with. For example, if you don’t have buttermilk, you can make a substitute by mixing milk with white vinegar or lemon juice.
- Over/undercooking signs: Keep an eye on your cakes while they’re baking. If they’re undercooked, they might sink in the center. If they’re overcooked, they might become too dry. Adjust the baking time as needed based on your oven’s performance.
FAQs
- Can I freeze it? Yes, the cake can be frozen for up to 2 months. It’s best to freeze it without the frosting and then frost it after thawing.
- Is it gluten-free? The original recipe uses all-purpose flour, which contains gluten. However, you can make a gluten-free version by substituting the flour with a gluten-free flour blend.
- Can I double the recipe? Yes, you can double the recipe to make a larger cake. Just remember to adjust the baking time accordingly, as a larger cake will take longer to bake through.
Conclusion
Creating the “two pictures of a cake with chocolate and green frosting on it, one has the same layer as the other” is a journey of culinary creativity and joy. With its accessible ingredients, straightforward instructions, and the potential for endless customization, this cake is perfect for anyone looking to impress with a minimum of fuss. Whether you’re celebrating a special occasion or just want to treat yourself and your loved ones to something special, this cake is sure to delight. So go ahead, get baking, and enjoy the process of turning a simple recipe into a masterpiece of taste and visual appeal.
two pictures of a cake with chocolate and green frosting on it, one has the same layer as the other
A rich chocolate cake layered with vibrant green frosting, perfect for special occasions or as a treat any time of the year.
🥘 Ingredients
👩🍳 Instructions
-
1Preheat the oven to 350°F (180°C). Prepare two 9-inch round cake pans.
-
2Whisk together flour, sugar, cocoa powder, baking powder, and salt in a medium bowl. Whisk together eggs, milk, and oil in a large bowl. Gradually add the dry ingredients to the wet ingredients, whisking until smooth.
-
3Divide the batter evenly between the prepared pans and smooth the tops. Bake for about 30-35 minutes or until a toothpick inserted in the center comes out clean.
-
4Let the cakes cool completely. For the frosting, beat the butter until creamy. Gradually add the powdered sugar, beating until smooth. Add green food coloring until the desired color is achieved. Adjust the consistency with milk or heavy cream if necessary.
-
5Place one cake layer on a serving plate, spread a generous amount of frosting on top, and then place the second layer on top. Frost the entire cake with the remaining frosting.