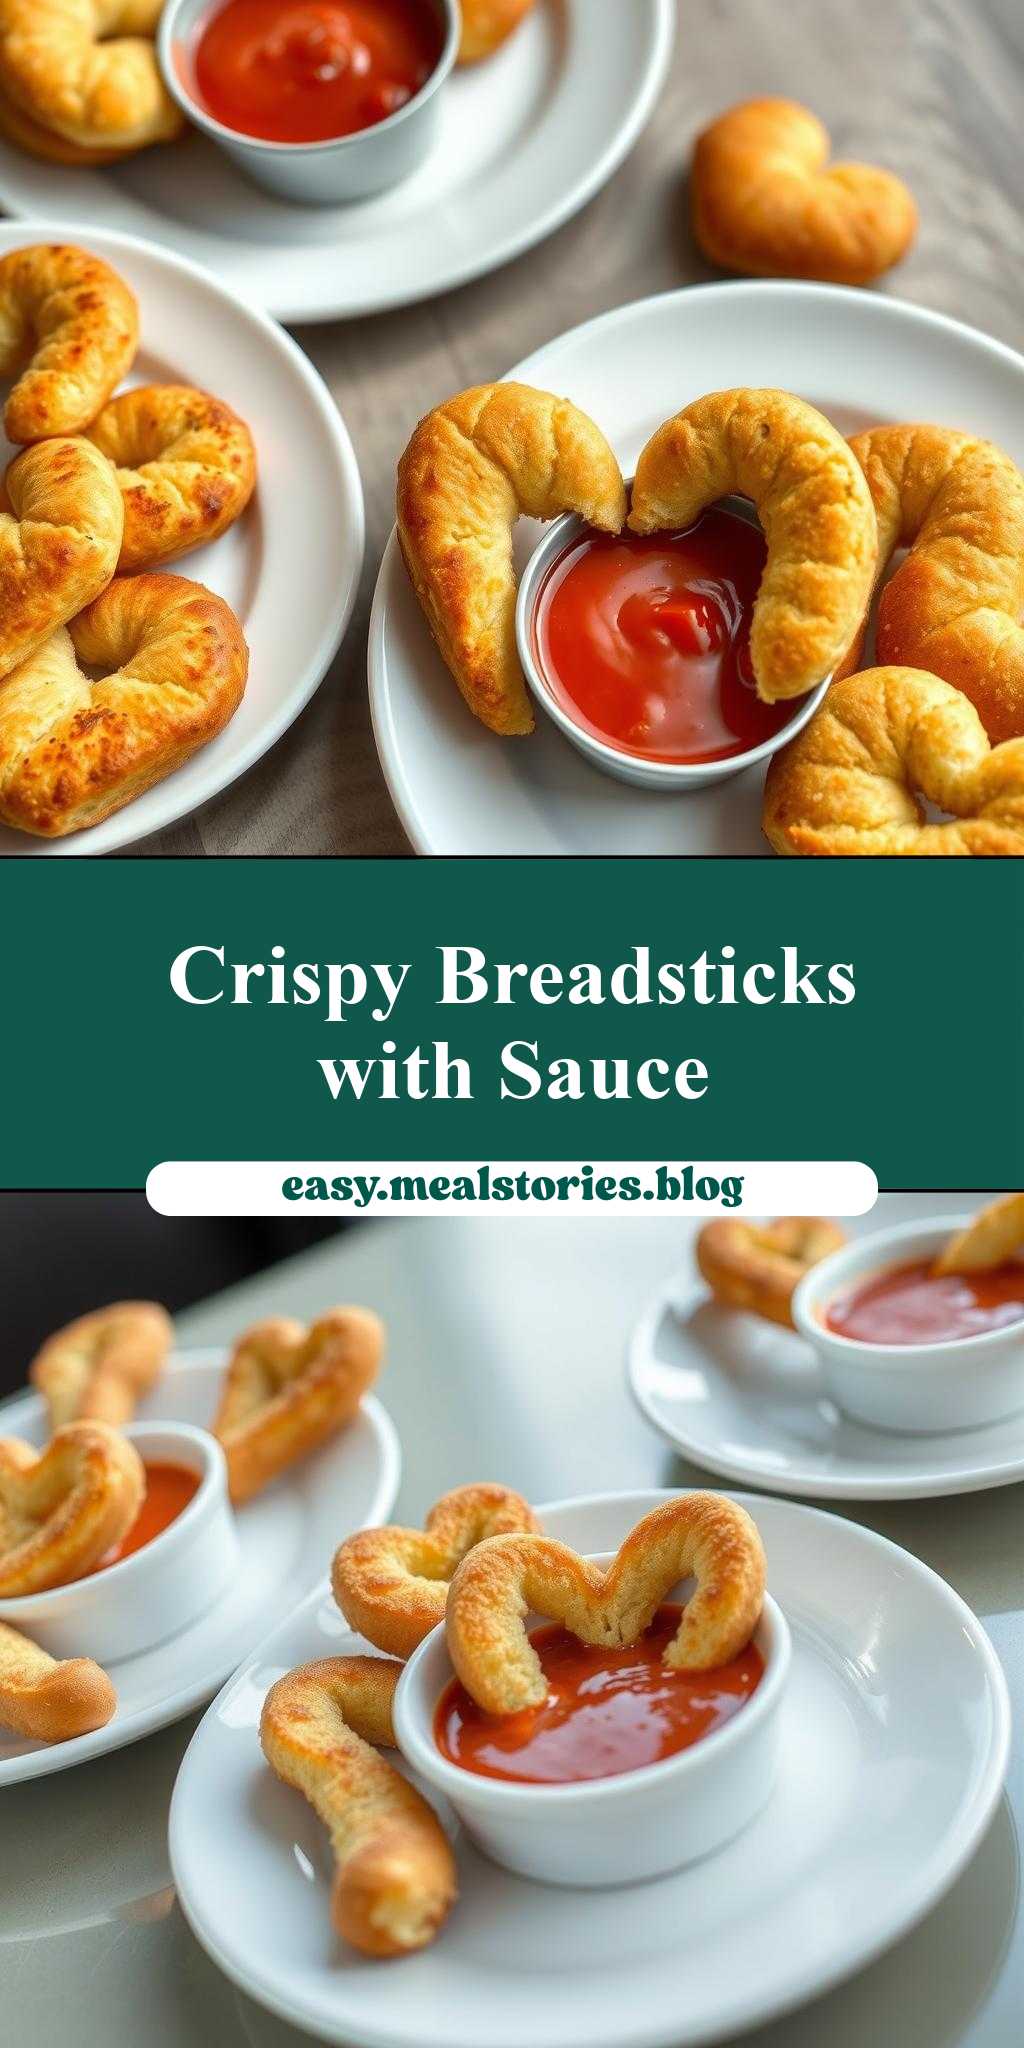
What’s the secret to making any meal instantly more charming? Serve it with heart shaped breadsticks, of course. Fresh from the oven, these easy homemade treats are perfect for a quick weeknight dinner, and they’re made with just a few simple ingredients, including warm pizza dough and melted mozzarella cheese. Pair them with your favorite dipping sauce for a family favorite that’s sure to please. Save this idea and try making them soon.
heart shaped breadsticks on plates with dipping sauce
Introduction
Imagine a delightful snack or appetizer that combines the warmth of freshly baked bread with the fun of a dipping sauce, all presented in a charming heart-shaped form. This recipe for heart-shaped breadsticks with dipping sauce is a perfect blend of ease, flavor, and creativity, using everyday ingredients that you might already have in your pantry. Whether you’re looking for a special treat for Valentine’s Day, a fun snack for a party, or just a delicious accompaniment to your favorite soups or salads, these heart-shaped breadsticks are sure to impress. They’re incredibly easy to make, requiring minimal effort for a result that’s both visually appealing and satisfyingly tasty.
Why This Works
- Flavor balance and ingredient accessibility: The combination of crispy breadsticks and a savory dipping sauce creates a perfect balance of flavors. The ingredients are easily accessible and can be found in most supermarkets, making this recipe highly approachable.
- Ease of preparation: The process of making these heart-shaped breadsticks is straightforward and simple, involving basic mixing and baking steps that don’t require specialized culinary skills.
- Impressive results with minimal effort: Despite the simplicity of the recipe, the end result is impressive and can elevate any meal or gathering. The heart shape adds a cute and playful touch, making it ideal for special occasions or everyday fun.
Key Ingredients
The main ingredients for this recipe include all-purpose flour, yeast, salt, sugar, olive oil, and warm water for the dough, along with any desired seasonings such as garlic powder, Italian seasoning, or sesame seeds for added flavor. For the dipping sauce, you can use a simple marinara sauce, a homemade or store-bought ranch dressing, or get creative with your own sauce recipe. Practical substitutions can be made based on dietary preferences or restrictions, such as using gluten-free flour for the dough or opting for a vegan dipping sauce alternative.
Instructions
- Step 1: Begin by mixing the warm water, yeast, and a pinch of sugar in a bowl. Let it sit for a few minutes until the yeast is activated and foamy. Then, add the flour, salt, and any desired seasonings to the bowl. Mix until a dough forms, and knead the dough for about 5 minutes until it becomes smooth and elastic.
- Step 2: Place the dough in a greased bowl, cover it, and let it rise in a warm place for about an hour, or until it has doubled in size. Preheat your oven to 400°F (200°C). Once the dough has risen, punch it down and divide it into smaller pieces, depending on how large you want your breadsticks to be.
- Step 3: Roll out each piece of dough into a long rope. Use a cookie cutter or a knife to shape the dough into heart shapes. Place the heart-shaped breadsticks on a baking sheet lined with parchment paper, leaving some space between each breadstick. Brush the tops with olive oil and sprinkle with any desired toppings, such as sesame seeds or grated cheese.
- Step 4: Bake the breadsticks in the preheated oven for about 12-15 minutes, or until they are golden brown. While the breadsticks are baking, prepare your dipping sauce according to your recipe or package instructions. Once the breadsticks are done, remove them from the oven and let them cool for a few minutes on a wire rack. Serve warm with your chosen dipping sauce.
Handy Tips
- For an extra crispy crust on your breadsticks, try baking them for an additional 2-3 minutes. Keep an eye on them to prevent burning.
- Experiment with different seasonings and toppings to give your breadsticks unique flavors. Garlic powder, dried herbs, and grated Parmesan cheese are all great options.
- If you find that your dough is too sticky, add a bit more flour. If it’s too dry, add a bit more warm water.
Heat Control
When baking the breadsticks, it’s crucial to maintain the right temperature and timing to achieve the perfect golden brown color and crispy texture without burning. The ideal temperature is 400°F (200°C), and the breadsticks should be baked for 12-15 minutes. Check for doneness by looking for a golden brown color and a firm texture. If you prefer a softer breadstick, bake for 10-12 minutes.
Crunch Factor
The crunch factor of your breadsticks can be adjusted based on your preference. For a crunchier breadstick, bake for the full 15 minutes or slightly longer, keeping a close eye to avoid overcooking. For a softer breadstick, reduce the baking time. You can also influence the crunch by the toppings you choose; for example, sesame seeds will add a nice crunch to the breadsticks.
Pro Kitchen Tricks
- To ensure your breadsticks rise evenly and have a light texture, make sure your yeast is fresh and active. Old yeast can lead to flat or dense bread.
- For easier cleanup, line your baking sheet with parchment paper before placing the breadsticks on it. This will prevent the breadsticks from sticking and make cleanup a breeze.
- Consider making the dough ahead of time and letting it rise in the refrigerator overnight. This can help develop the flavors and make the dough easier to work with in the morning.
Storage Tips
- Leftover breadsticks can be stored in an airtight container at room temperature for up to 2 days. For longer storage, consider freezing the breadsticks before baking and then baking them frozen for an extra few minutes when you’re ready.
- For reheating, place the breadsticks in the oven at 350°F (175°C) for a few minutes until warmed through. You can also reheat them in the microwave, but be careful not to overheat, as this can make the breadsticks tough.
- The dipping sauce can usually be stored according to its specific recipe instructions. Many sauces can be refrigerated for up to a week or frozen for longer storage.
Gift Packaging Ideas
If you’re considering gifting these heart-shaped breadsticks, they can be beautifully packaged in decorative jars or bags with a ribbon and a card. Include a side of dipping sauce in a smaller jar or container for a complete gift. For a more rustic look, place the breadsticks in a paper bag and tie the top with twine, adding a handwritten note with the recipe or a personal message.
Flavor Variations
- Different spices: Try adding different spices or herbs to the dough for unique flavors. Italian seasoning, garlic powder, and dried oregano are all great options.
- Creative toppings: Experiment with various toppings such as sesame seeds, poppy seeds, grated cheese, or chopped fresh herbs to add texture and flavor.
- Ingredient swaps: For a gluten-free version, use gluten-free flour. For a vegan version, ensure that your dipping sauce and any toppings are vegan-friendly.
Troubleshooting
- Texture problems: If your breadsticks turn out too dense, check that your yeast is fresh and that you didn’t overmix the dough. If they’re too crispy, they might have been overbaked.
- Ingredient replacements: Always try to substitute ingredients with similar properties to maintain the balance of the recipe. For example, if replacing olive oil, use another oil with a similar flavor profile.
- Over/undercooking signs: Keep an eye on your breadsticks while they’re baking. Undercooked breadsticks will be pale and soft, while overcooked ones will be dark brown and hard.
FAQs
- Can I freeze it? Yes, you can freeze the breadsticks before baking. Simply place them on a baking sheet, freeze until solid, and then transfer them to a freezer-safe bag or container. Bake frozen breadsticks for an additional 2-3 minutes.
- Is it gluten-free? The original recipe contains gluten due to the all-purpose flour. However, you can make a gluten-free version by substituting the flour with a gluten-free alternative.
- Can I double the recipe? Yes, you can easily double or triple the recipe if you’re serving a larger crowd. Just remember to adjust the baking time slightly if you’re baking a large batch at once.
Conclusion
Making heart-shaped breadsticks with dipping sauce is a fun and rewarding baking project that’s perfect for any occasion. With its simple ingredients, easy instructions, and delightful presentation, this recipe is sure to become a favorite. Don’t hesitate to experiment with different flavors and toppings to make it your own, and enjoy the process of creating something delicious and visually appealing. Whether you’re a seasoned baker or just starting out, this recipe is a great way to bring joy and warmth to your table, and it makes for a wonderful gift or snack to share with friends and family.
heart shaped breadsticks on plates with dipping sauce
A simple and delicious recipe for heart-shaped breadsticks served with a tasty dipping sauce, perfect for snacks, parties, or special occasions.
🥘 Ingredients
👩🍳 Instructions
-
1Mix yeast, warm water, and sugar. Let it sit until foamy.
-
2Add flour, salt, and mix until a dough forms. Knead for 5 minutes.
-
3Let the dough rise for about an hour, then punch it down.
-
4Shape into heart shapes, brush with olive oil, and bake at 400°F (200°C) for 12-15 minutes.